Get ready for the revolutionary Spotify Desktop Equalizer to take your music experience to a whole new level. As you consider the vast array of sound options, from crystal-clear highs to heart-thumping bass, you’ll realize the audio spectrum is flawlessly balanced.
Whether you’re a dedicated audiophile, a casual listener, or a music enthusiast in pursuit of the ultimate auditory nirvana, the Spotify Desktop Equalizer is designed to revolutionize how you perceive and immerse yourself in your favorite music, bringing it to life like never before.
A common query among users, Why am I getting ads on Spotify Premium? may arise as you navigate your listening experience. This question, however, does not impact the functionality of the Spotify Desktop Equalizer.
It remains a tool accessible to all, whether you encounter ads on your premium account or enjoy an ad-free experience. This equalizer ensures that every user, regardless of their subscription status, can tailor their sound settings to perfection, uninterrupted by external factors. Dive into this transformative world of sound and prepare to be enthralled.
Instant Solution:
Right-click on the Speaker icon in the left corner of your screen. Navigate to Sound Setting, then choose More Sound Option. Here, select properties and, finally, click on enhancements to adjust the Spotify equalizer on your PC.
What is Spotify Desktop Equalizer
Say goodbye to one-size-fits-all sound profiles and hello to a world of infinite customization with the Spotify Equalizer on your PC. Unlike the Mobile PC version, the desktop equalizer gives you complete control to fine-tune every frequency to match your preferences.
Whether it’s rediscovering the depth, richness, and nuances of your favorite tunes or releasing the hidden potential of your headphones or speakers, this tool is all about power and audio optimization at your fingertips. From classical masterpieces to bass-heavy sounds, it ensures your audio quality is never sacrificed for convenience.
The equalizer’s straightforward, clean UI makes it easy to navigate through configurable settings. You can craft your signature sound effortlessly. Increase the treble for glittering clarity in delicate melodies, boost the bass for that earth-shattering rumbling, or fine-tune the midrange to highlight those goosebumps-inducing vocals.
The Spotify Desktop Equalizer transforms how you interact with music, providing a unique, personalized listening experience.
How to Change the Equalizer of Spotify on a PC?
Changing the Spotify Desktop Equalizer settings can turn your ordinary listening session into a genuinely immersive and personalized experience. Whether you’re banging out tunes at home, in the studio, or on the move, it’s time to buckle up, music fans!
You’re about to discover the actual potential of your favorite songs, podcasts, and best audiobooks. Get ready to be amazed, touched, and taken to other places as you explore the world of sound. Turn up the music and find your music selection again. You’re welcome to the future of personalized audio.
To adjust the equalizer settings (EQ) on the Spotify desktop application, follow these steps:
• Step 1: Open Spotify: Launch Spotify on your computer using the search bar in Windows.
• Step 2: Open Settings: Click on the downward arrow icon near your profile image in the right corner of the Spotify window. You can choose “Settings” from the drop-down menu.

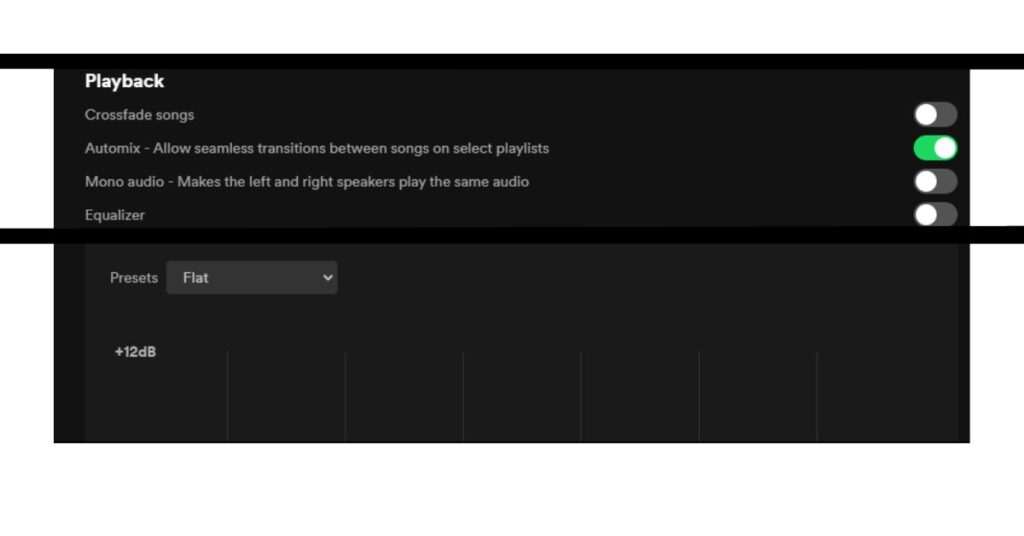
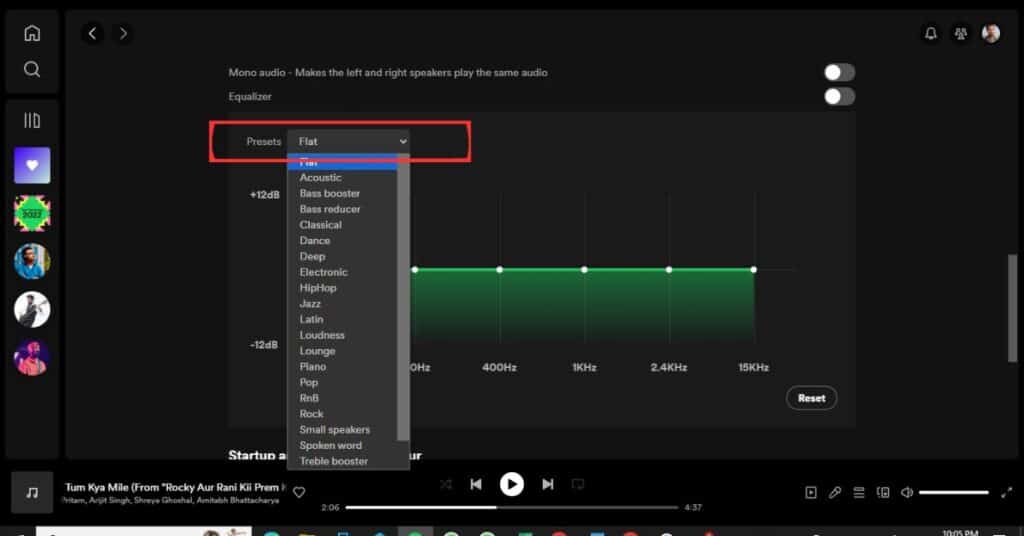
• Step 3: Find a way to play: Find “Playback” by scrolling down. Select the “Equalizer” toggle switch and turn it on if it’s not already on. The options for the equalizer will be shown.

• Step 4: Adjust Eq: Move the sliders to your desired frequencies. You can choose from various presets, like “Bass Booster” and “Vocal Booster,” or create unique EQ settings.

Close the Settings window after you’re done making changes, and they will be applied.
How to Use Equalizer for Spotify on Windows 10
Enhancing your Spotify experience on Windows 10 is straightforward, with access to the equalizer settings.
Follow these steps to adjust the equalizer:
- Right-click again on the volume control icon in the system taskbar and choose Properties.
- In the Sound Settings, Click on “Device properties” under the “Out” section.
- Next, click the “Additional device properties” button in the Device Properties window.
- Navigate to the “Enhancements” in the Speaker Properties window.
- Here, you will find various Equalizer options. Check the “Equ” lizer” check box and click the button to access more settings.
- Use the “Rest” or “Default” button to return the equalizer settings to their default values.
- Once you have your modifications, click the “OK” button to apply your settings.
These simple steps allow you to customize your audio settings on Spotify for Windows 10, ensuring an optimal listening experience tailored to your preferences.
How to Use Equalizer On PC Windows 11
When using Spotify on Windows 11, you have the flexibility to change the audio output to enhance your listening experience. This can be achieved through your computer’s built-in sound settings, a third-party equalizer, or various DJ tools.
Users of Windows 11 are particularly lucky, as the system includes a built-in equalizer. This feature allows you to adjust the audio output for an optimal Spotify experience finely.
Here’sHere’sp-by-step guide to adjust the equalizer:
- Right-click on the speaker icon located in the lower right corner of your screen.
- Select “Properties” and “hen Open Sound Settings.
- In the Sound Settings, Scroll down to find more sound setting options.
- A list of All Kinds of your External and Internal sound Output devices will appear.
- Click on the Required speaker, then navigate to the Enhancements tab in the Speaker Properties window.
- Here, you can adjust the three equalizer parameters to your liking.
- When you’re done making changes, hit “OK” to “save your changes.”
By following these steps, you can tailor the sound output on your Windows 11 PC to match your personal preferences, ensuring an enriched Spotify listening experience.
How to Use Equalizer on Mac?
For Mac users, understanding the limitations of your system is crucial, especially when it comes to audio customization. Unlike other platforms, Mac does not offer a direct way to access the Equalizer for Spotify.
However, Mac enthusiasts can still enhance their listening experience by accessing EQ settings through the Music app. The Music app on Mac comes with a built-in equalizer that lets you adjust the sound of your music to your liking. To use it, open the Music app, navigate to Window > Equalizer, and use the sliders to fine-tune the EQ settings.
For those seeking more advanced options, there are several third-party equalizer apps available for Mac. Popular options include Boom 3D, Equalizer APO, and FXSound. These apps offer a variety of features and settings, allowing you to find one that suits your needs perfectly.
Whether you are looking for subtle adjustments or profound audio changes, these tools will cater to your requirements and elevate your music listening experience on Mac.
How to Use Equalizer on Spotify Mobile
Spotify has introduced enhanced music quality and mix fade features in its application, but one of its most notable additions is the dedicated equalizer available on each platform, including iPhone and Android.
This allows users to modify the EQ settings to their taste directly within the Spotify Settings. For instance, connecting your AirPods and playing songs on Spotify is a match made in heaven. You can easily change and increase the bass or adjust other frequencies for an optimal listening experience.
To adjust the equalizer on Spotify Mobile, here is a step-by-step process:
- Launch Spotify on your Android or iPhone.
- Click on the gear button.
- Select “Equ” lizer” un” in the Playback section.
- Start the Equalizer mode and choose how you want it to work.
By following these simple steps, you can customize your audio experience, ensuring that your favorite tracks sound just the way you like.
Whether it’s boosting the bass or fine-tuning the treble, Spotify’s equalizer puts the power of audio customization right at your fingertips.
FAQs
How to Reset Equalizer on Spotify Desktop?
To reset the Equalizer settings on the Spotify app on your computer, you need to follow a few simple steps:
1. Open the Spotify app.
2. Click on the three dots in the app window’s top right corner.
3. Select “Se” things.”
4″ Scroll down to the Playback section.
5. Find the Equalizer option.
6. Press the “Reset” button.
By doing so, the equalizer settings in your Spotify app will revert to their default values, allowing you to start afresh with customizing your audio experience.
Is there an Equalizer on Spotify PC?
Yes, both Spotify PC and mobile versions include a default equalizer. This equalizer feature allows users to tweak the sound settings to suit their listening habits better. There are various presets to choose from, catering to different musical preferences.
Is the equalizer only for Spotify Premium?
No, Spotify makes its equalizer feature open to all devices and users, regardless of platforms or subscriptions. Both free-version users and premium users have the option to access the equalizer. As a premium user, you can also stream music in high quality.
Conclusion
In conclusion, changing the Spotify equalizer on a PC is a versatile and user-friendly process, accessible to all users irrespective of their subscription status. Whether using Windows 10, Windows 11, or a Mac, the steps to adjust the equalizer are straightforward and cater to a wide range of audio preferences.
Spotify’s commitment to providing a customizable listening experience is evident through its inclusion of a default equalizer in both its PC and mobile versions, allowing users to enhance their music quality, whether they are premium subscribers or using the free version.
With various presets available, users can easily fine-tune their audio settings to suit their listening habits, making Spotify a genuinely adaptable platform for all music enthusiasts.

