
Spotify Header Image
First things first, what exactly is a Spotify header image? It’s that big banner at the top of your Spotify profile. This image is crucial because it’s often the first thing people see when they visit your profile. It sets the tone and gives a visual representation of who you are and what you’re about.
The header image is more than just eye candy; it plays a key role in your profile’s overall appeal. A well-designed image can convey professionalism, creativity, and attention to detail qualities that can help attract and retain visitors.
Now, let’s get technical for a moment. Spotify has specific requirements for header images. The recommended dimensions are 1920 pixels wide by 640 pixels tall. The file size should be under 2MB, and the formats accepted are JPEG and PNG. Keeping these specs in mind ensures your image looks great and loads quickly.
Planning Your Spotify Header Image
Before you jump into designing, it’s important to plan your Spotify header image. Think of this step as laying the groundwork for a successful project. Proper planning helps ensure your final design aligns with your brand and effectively communicates your message.
Start by defining the theme or concept for your header image. What do you want to highlight about your brand? If you’re a musician, you might want to use imagery related to your genre, instruments, or recent album artwork. If you’re a podcaster, consider incorporating elements that reflect the topics you cover or your show’s branding.
Brainstorming is a great way to get your creative juices flowing. Create a list of keywords and visual elements associated with your brand. Sketch some rough drafts to visualize different concepts and choose the one that best fits your brand.
Choosing the Right Tools
Next up, let’s talk about tools. Having the right tools can make a huge difference in the quality and ease of your design process. Here are a few popular options:
Canva
Canva is super user-friendly and great for beginners. It offers a range of templates, graphics, and fonts, making it easy to create professional designs without any prior experience. Canva has both free and paid versions, with the paid version offering more features.
Adobe Spark
Adobe Spark is another fantastic tool for creating stunning visuals. It provides a variety of templates and design elements, along with advanced customization options. Adobe Spark is perfect for creating social media graphics, including Spotify header images, and also offers both free and paid plans.
Photoshop
For those with more advanced design skills, Photoshop is a powerhouse. It offers extensive capabilities for creating detailed and complex designs. While it has a steeper learning curve, Photoshop allows for greater precision and creativity. It’s a paid tool, but a free trial is available for new users.
Choose a tool that fits your design experience and budget. If you’re new to design, Canva or Adobe Spark might be the best options. For more experienced designers, Photoshop provides the flexibility and advanced features needed to create a truly unique header image.
Designing Your Header Image
Now, let’s get to the fun part designing your header image! Here’s a step-by-step guide to help you create a stunning header:
Setting up the canvas:
Open your chosen design tool and set up a new project with the correct dimensions (1920×640 pixels). This ensures your image fits perfectly within Spotify’s layout.
Adding background images or colors:
Choose a background that complements your brand. This could be a solid color, a gradient, or a high-quality image. Ensure the background doesn’t distract from other elements in your design.
Incorporating text and other design elements:
Add text to your header image to convey important information, such as your name, tagline, or social media handles. Use fonts that are easy to read and consistent with your brand’s style. Additionally, include other design elements like logos, icons, or graphics that enhance the overall look.
Ensuring the image is cohesive and visually appealing:
Arrange the elements in a balanced and aesthetically pleasing manner. Pay attention to alignment, spacing, and color harmony. Your goal is to create a cohesive design that captures attention and conveys your brand’s message effectively.
Tips for maintaining brand consistency:
Use colors, fonts, and design elements that are consistent with your overall branding. This creates a unified look across all your online platforms and helps reinforce your brand identity.
Take your time with each step, experimenting with different layouts and design choices until you achieve a header image that looks professional and aligns with your brand’s identity.
Optimizing for Quality
To ensure your Spotify header image looks professional and sharp, it’s essential to optimize it for quality. High-resolution images are crucial for preventing blurriness or pixelation, especially on larger screens. Here are some tips for optimizing your header image:
- Using high-resolution images: Always start with high-resolution images to maintain clarity and sharpness. Avoid using low-quality images that can appear pixelated when scaled up to fit the header dimensions.
- Optimizing the image to prevent blurriness or pixelation: When resizing images, use tools that maintain image quality. Most design tools offer options to adjust the resolution and quality settings. Aim for the highest possible resolution without exceeding Spotify’s file size limit.
- Saving the file in the correct format and size: Save your final design in JPEG or PNG format, as these are the accepted formats on Spotify. Ensure the file size is under 2MB to comply with Spotify’s requirements. Use compression tools if necessary to reduce the file size without compromising image quality.
By following these optimization tips, you can create a header image that looks crisp and professional, enhancing the overall appearance of your Spotify profile.
Uploading Your Header Image to Spotify
Once your header image is designed and optimized, the next step is to upload it to your Spotify profile. Follow this step-by-step guide to ensure a smooth upload process:
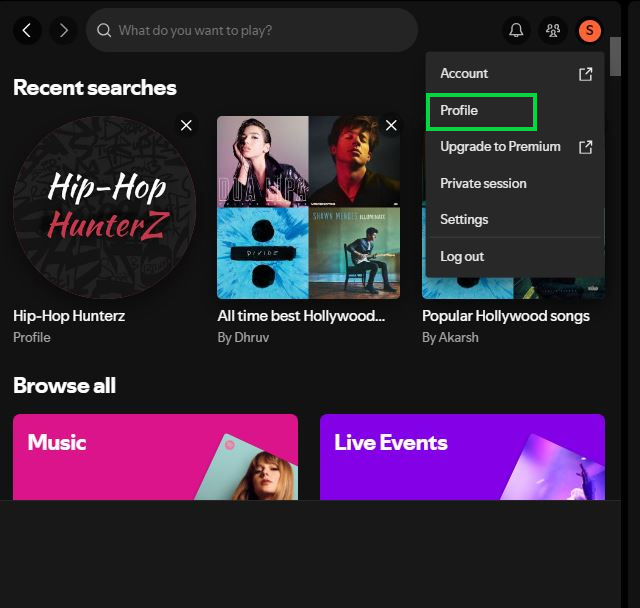
- Accessing your profile settings: Log in to your Spotify account and navigate to your profile page. Click on the “Edit Profile” button to access your profile settings.
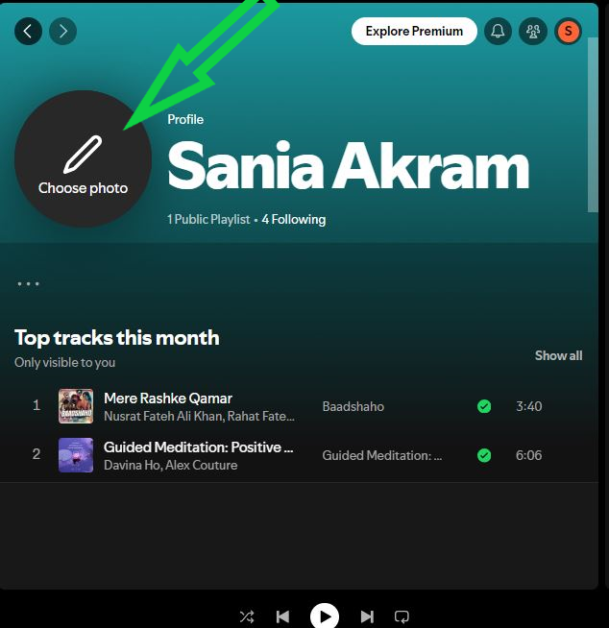
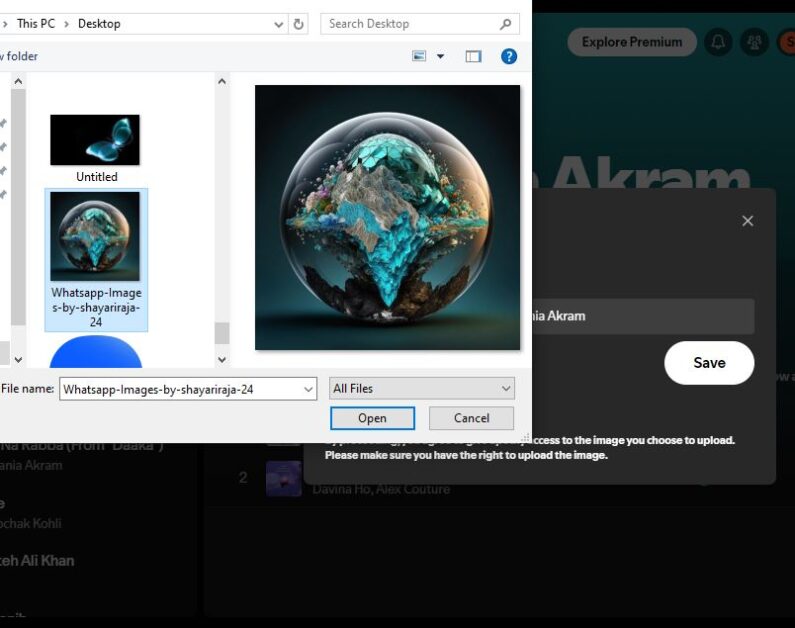
- Uploading the header image: In the profile settings, you’ll see an option to upload a header image. Click on this option and select the file from your computer. Ensure the image meets Spotify’s specifications (1920×640 pixels, under 2MB, JPEG or PNG format).
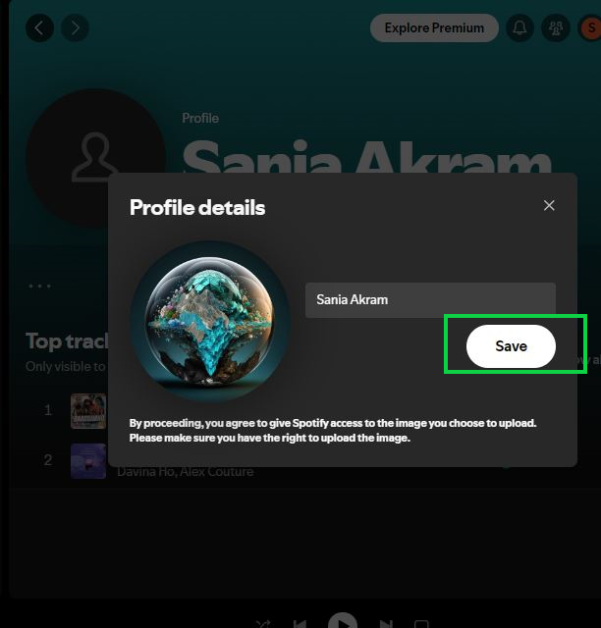
- Adjusting the image if necessary: After uploading, you may have the option to adjust the positioning or cropping of the image. Make any necessary adjustments to ensure the image is centred and looks as intended.
- Saving changes: Once you’re satisfied with the placement of the image, save the changes to update your profile.
Testing and Adjusting
After uploading your header image, it’s important to test how it appears across different devices to ensure it looks good everywhere. Here are some tips for testing and adjusting your image:
Viewing the image on different devices:
Check how your header image looks on various devices, including desktop computers, tablets, and smartphones. Pay attention to how the image scales and whether any important elements are cut off or misaligned.
Making adjustments based on feedback:
If you notice any issues with the image’s appearance, go back to your design tool and make the necessary adjustments. This could involve repositioning elements, resizing the image, or making other tweaks to ensure it looks great on all devices.
Checking for alignment and visibility of key elements:
Ensure that all important elements of your design are clearly visible and properly aligned. Text should be readable, and key graphics should not be obscured.
By thoroughly testing and adjusting your header image, you can ensure it provides a consistent and professional appearance across all devices.
Final Touches and Tips
To give your Spotify header image a polished and professional look, consider adding some final touches. Here are some suggestions:
Adding finishing touches
Small details can make a big difference. Consider adding subtle effects, such as shadows or highlights, to enhance the overall look. Ensure that these touches complement the design without overwhelming it.
Standing out with unique designs
To make your header image truly unique, consider incorporating animations or interactive elements. These can capture your attention and make your profile stand out even more.
Regular updates
Keep your profile fresh by updating your header image regularly. This could be done to reflect new releases, seasonal themes, or changes in your brand. Regular updates show that your profile is active and engaged.
By following these tips and regularly refreshing your header image, you can maintain a dynamic and engaging Spotify profile.
Conclusion
In this guide, we’ve covered the essential steps to create a compelling Spotify header image. We discussed the importance of understanding the specifications, planning your design, choosing the right tools, designing step-by-step, optimizing for quality, uploading the image, testing and adjusting, and adding final touches.
A well-designed header image is a powerful tool for making a strong first impression and enhancing your profile’s overall appeal. By following this guide, you can create a header image that not only meets Spotify’s requirements but also reflects your unique style and message.
Now that you have the knowledge and tools to create an impressive header image,